Introducing the Swift plugins
Table of Contents
Introduction
This post introduces some new native plugins that we’ve been working on that can build Swift libraries and applications. They work on both macOS and Linux with the official Swift compiler.
The plugins take advantage of the many features baked into Gradle core, such as a rich dependency management engine as well as source dependencies, build cache, composite builds, finer grained parallel execution, build scans, and more. Note that, unfortunately, the plugins can’t be used out of the box to build iOS application and libraries.
If you’d like to provide feedback, please get in touch with us.
Building an application #
You can find all of the samples from this post in the Gradle native samples GitHub repository. Let’s look at building a simple application.
The build script should look familiar to anyone who has used Gradle’s Java plugins:
plugins {
    id 'swift-application'
}
This application has no dependencies, and the Swift source files are located in the default location: the src/main/swift directory.
Since this is Gradle, you can easily configure the source locations to match whatever layout your project requires, including the common Swift package manager pattern.
Here’s the result of running ./gradlew assemble on this sample:

Take a look at the build scan for this build to see what happened in more detail.
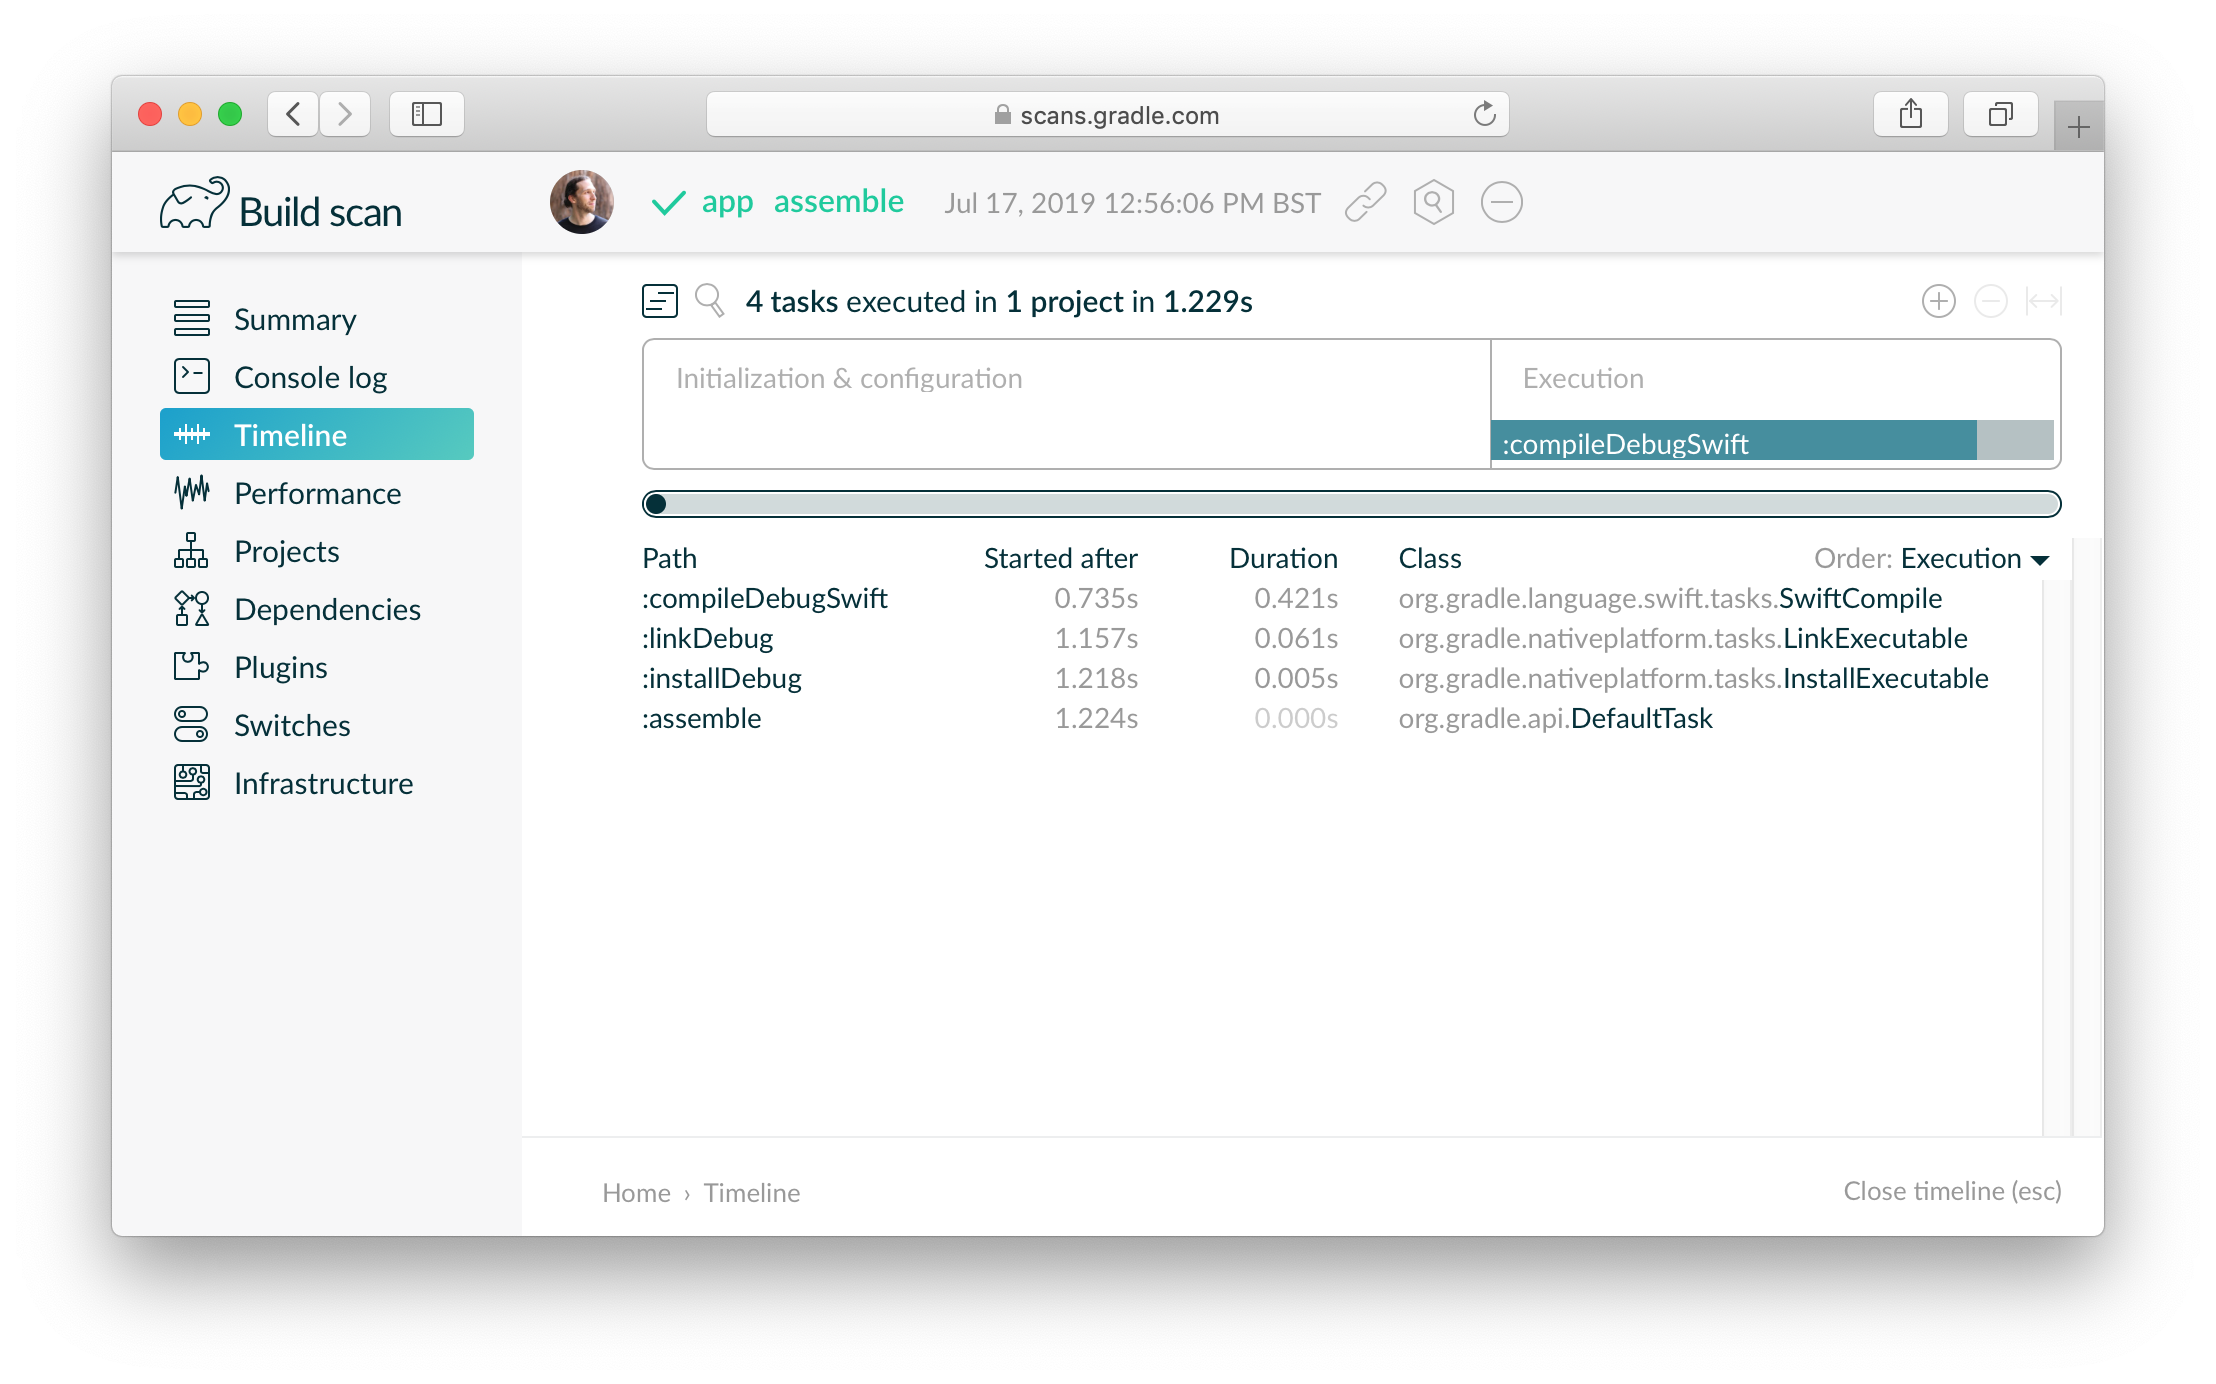
The plugins automatically find the compiler, linker and other tools to build the application.
The result ends up installed in the build/install directory ready to run.
IDE support #
Xcode is currently supported for Swift projects.
You can just run ./gradlew openXcode.
Gradle will generate the workspace and open the generated workspace in Xcode.
Support for other IDEs will be gradually added.
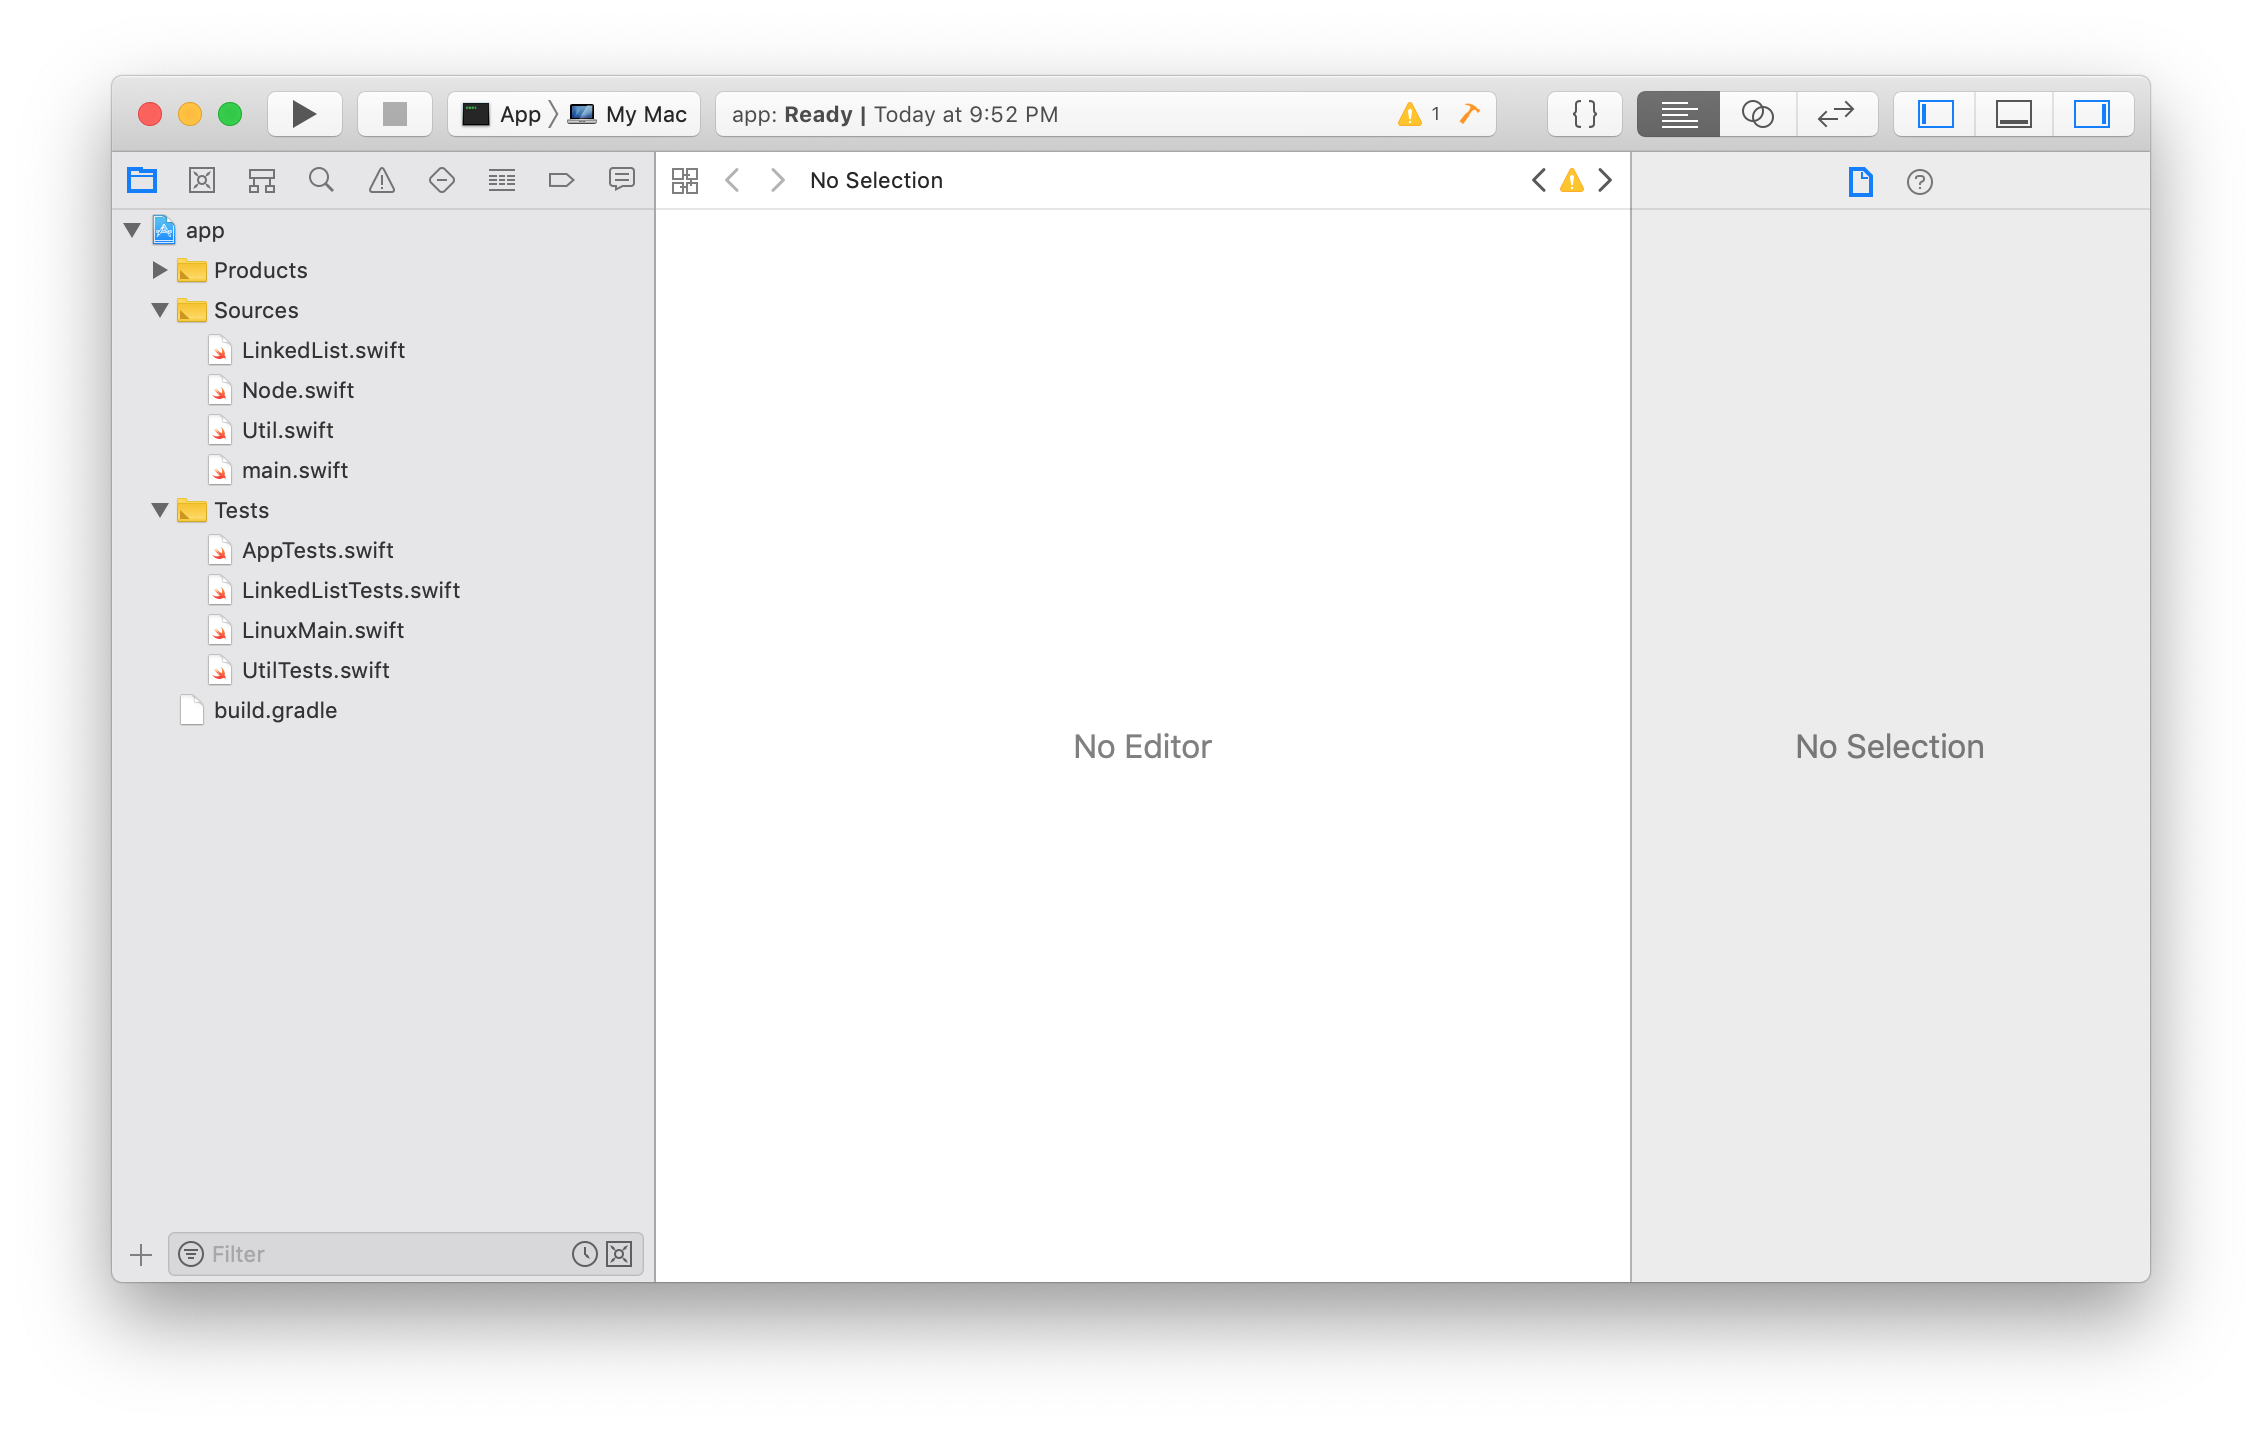
Here is the result of running ./gradlew openXcode on the sample:
This is how the workspace looks in Xcode:
Dependencies #
The plugin uses Gradle’s dependency management features, just like other plugins such as the Java or Android plugins. This means, for example, transitive dependencies work just fine.
Let’s add a dependency on a library to the application. In this sample, the library and it’s dependencies are built before compiling and linking the application. You don’t have to add the transitive library anywhere manually to your build script.
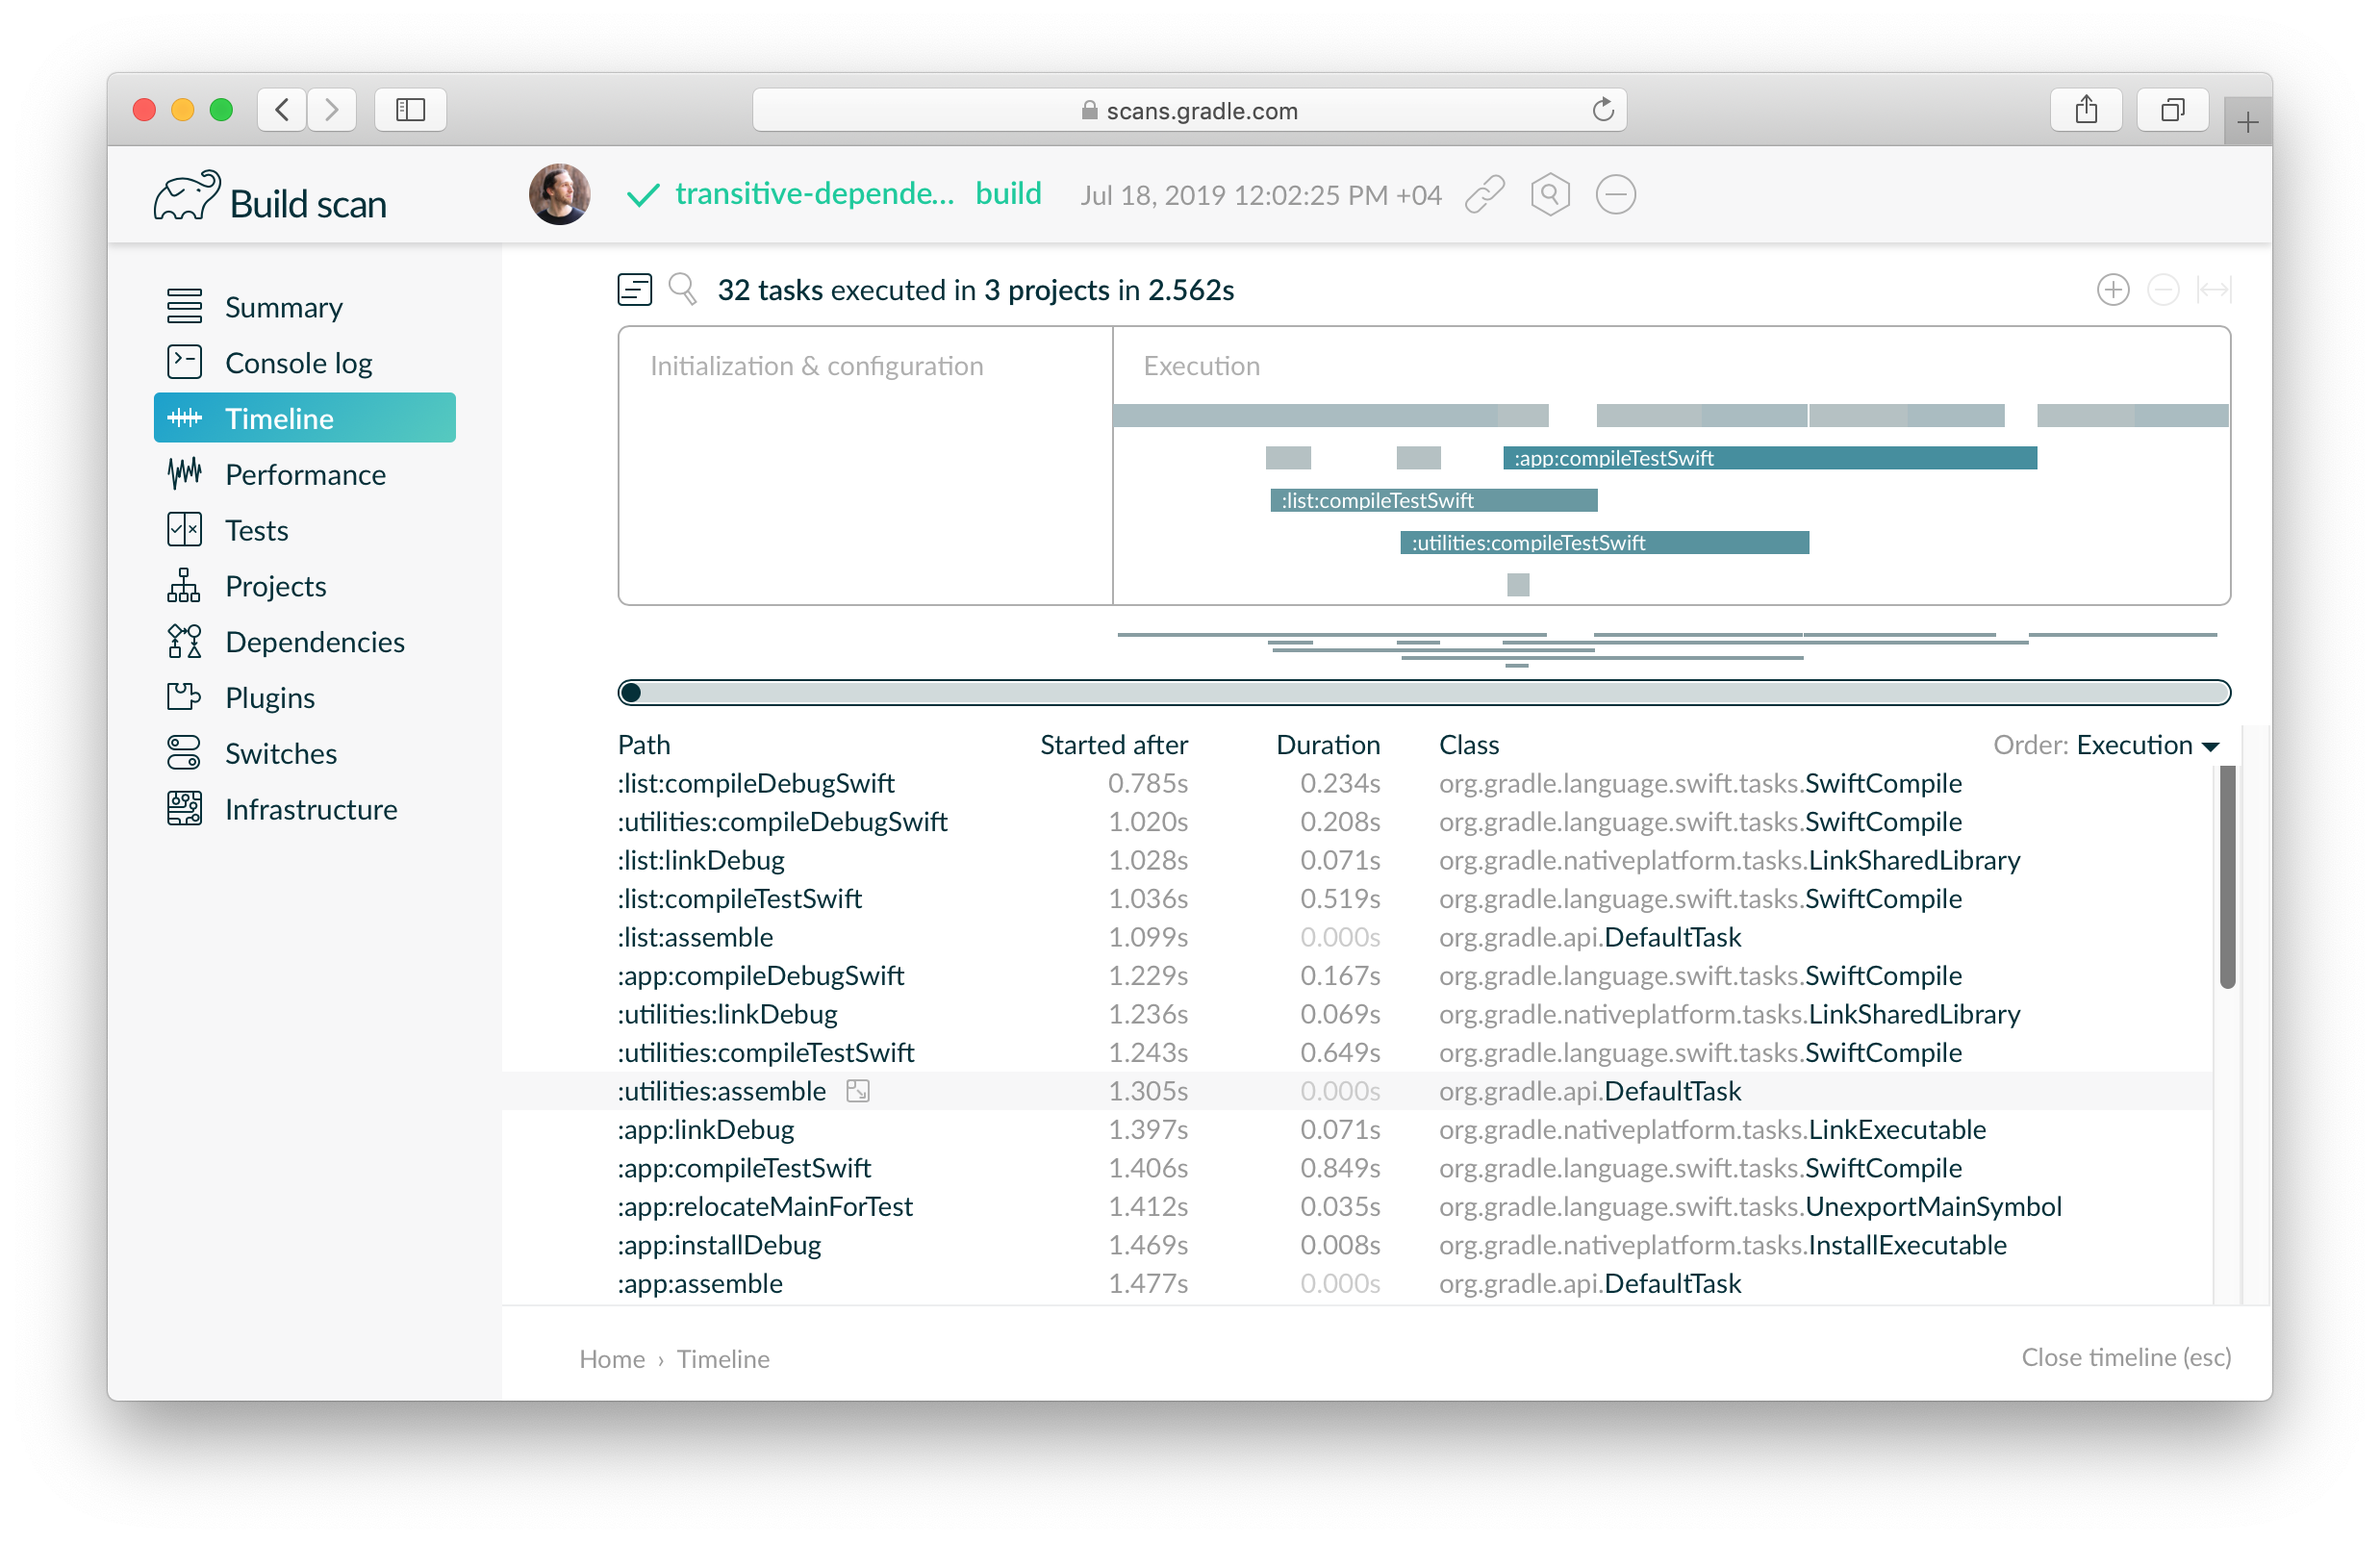
Here is the result of running ./gradlew build on the sample:

Take a look at the build scan for this build to see what happened in more detail.
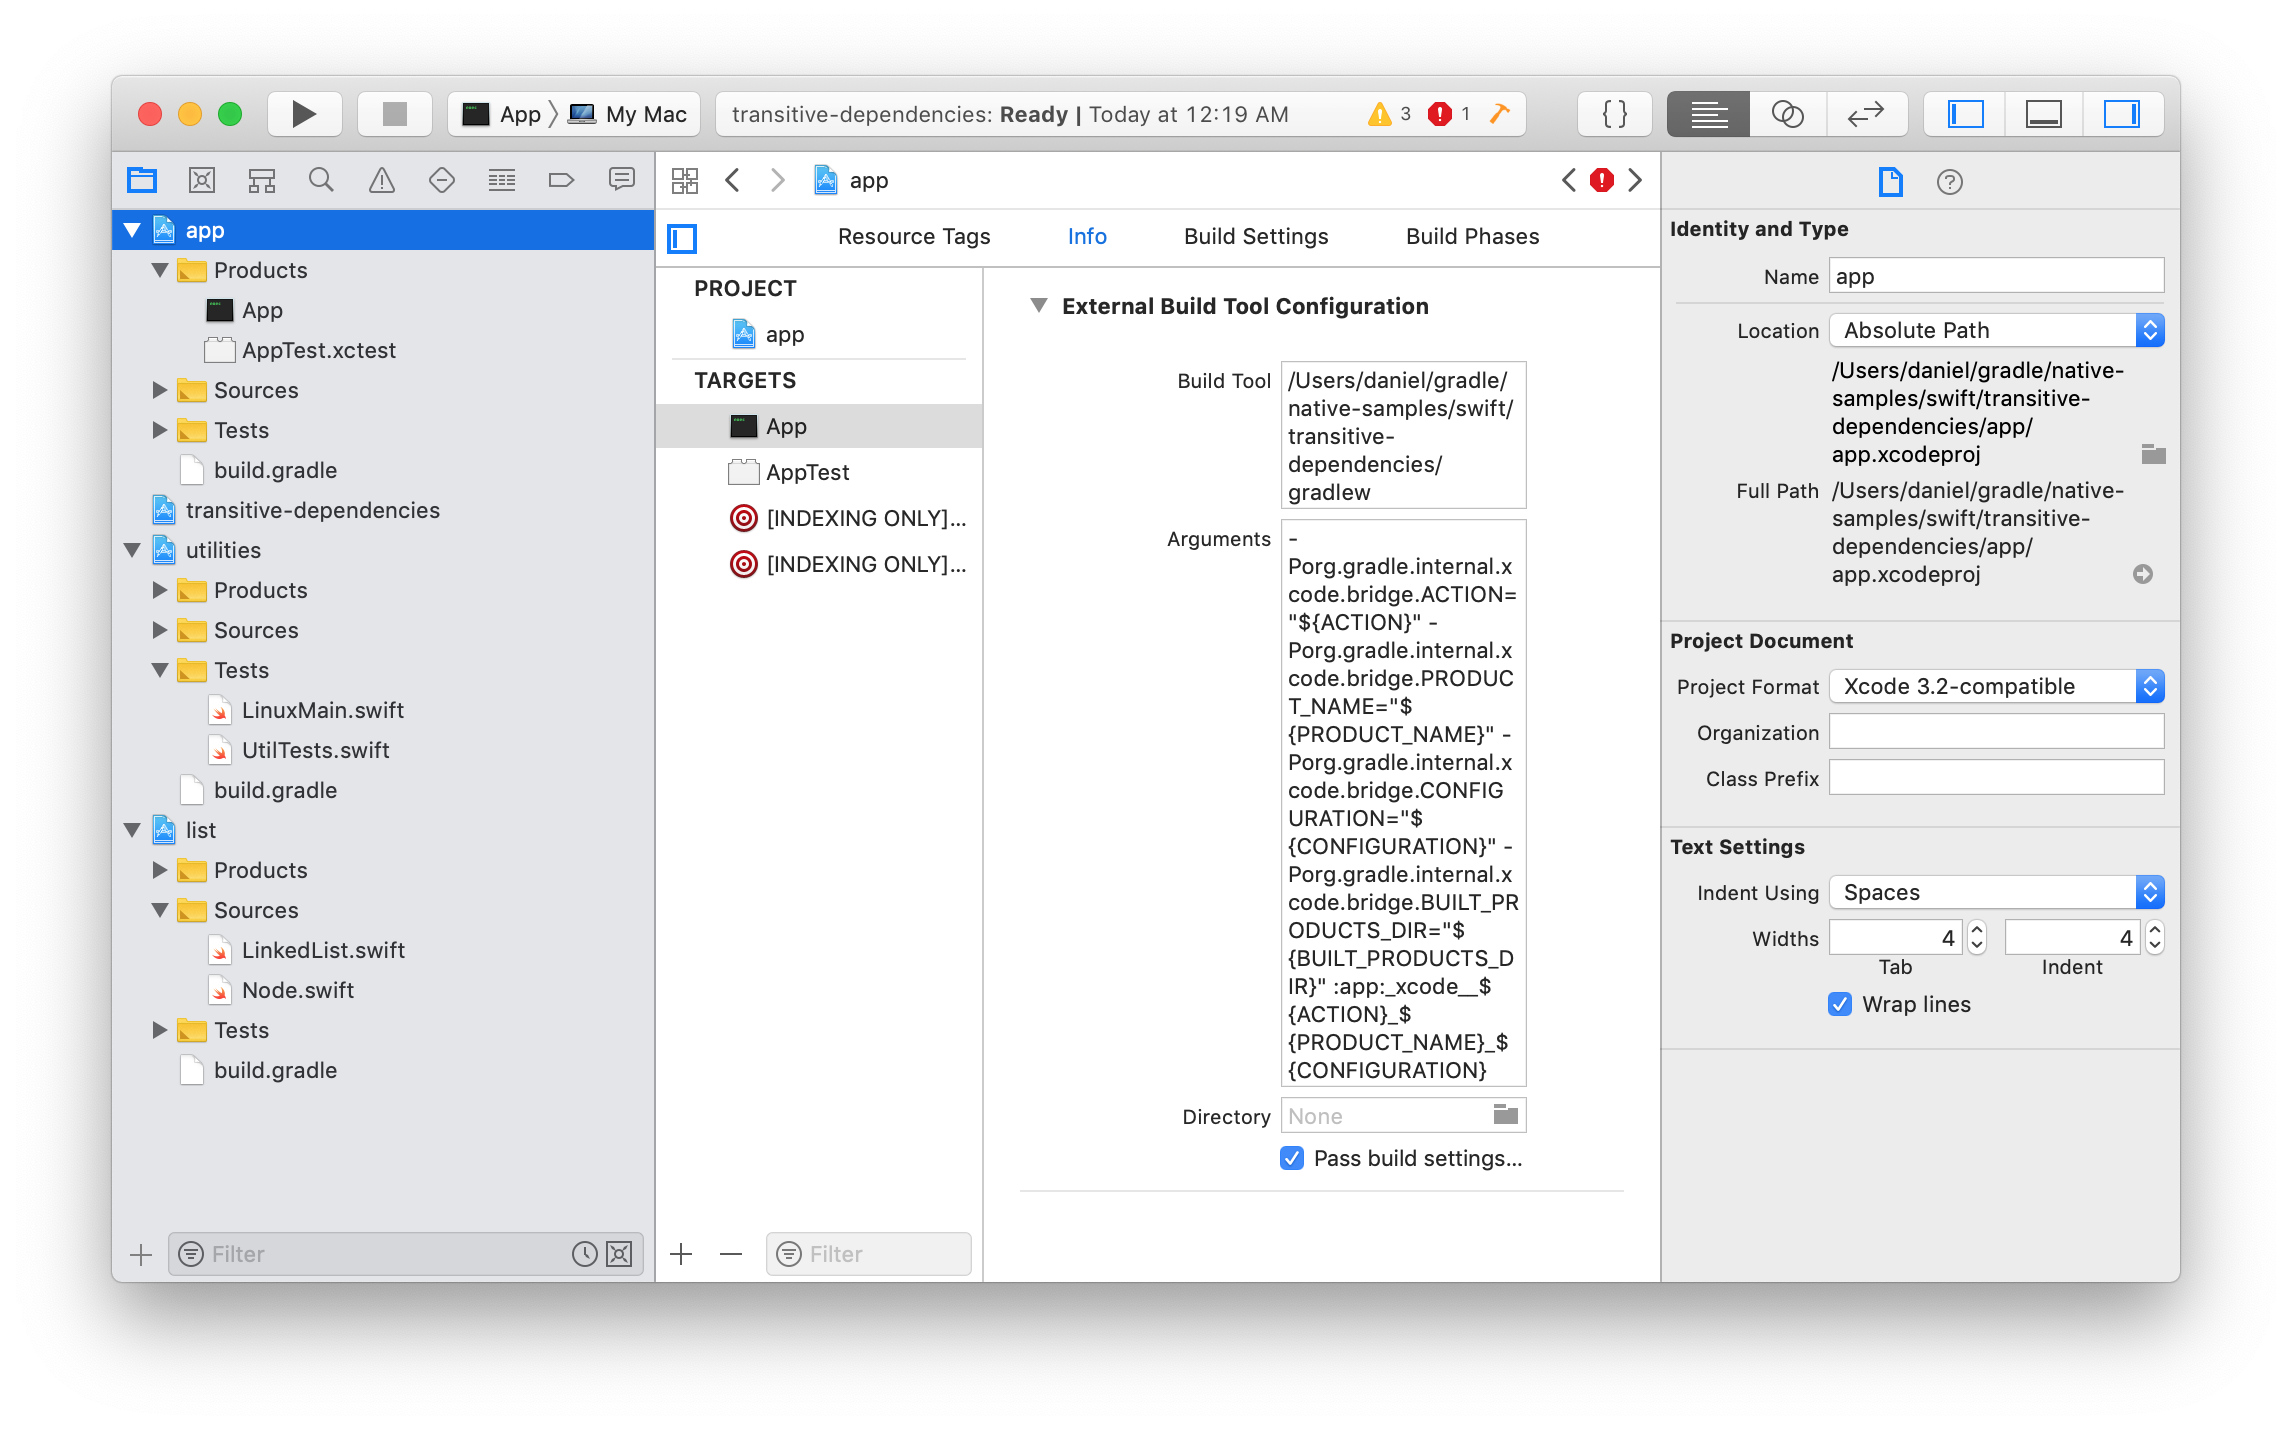
Here is how this project looks in Xcode:
Tests #
XCTest testing is supported out of the box. Here is a sample that uses XCTest. It will locate the XCTest Framework inside your Swift tool chain installation.
The build script applies the XCTest plugin which configures your build to generate an XCTest bundle on macOS or an XCTest executable on Linux:
plugins {
    id 'xctest'
}
Here is the result of running ./gradlew check. Gradle locates the XCTest module inside the tool chain installation, compiles the Swift source and tests, and then runs the tests:

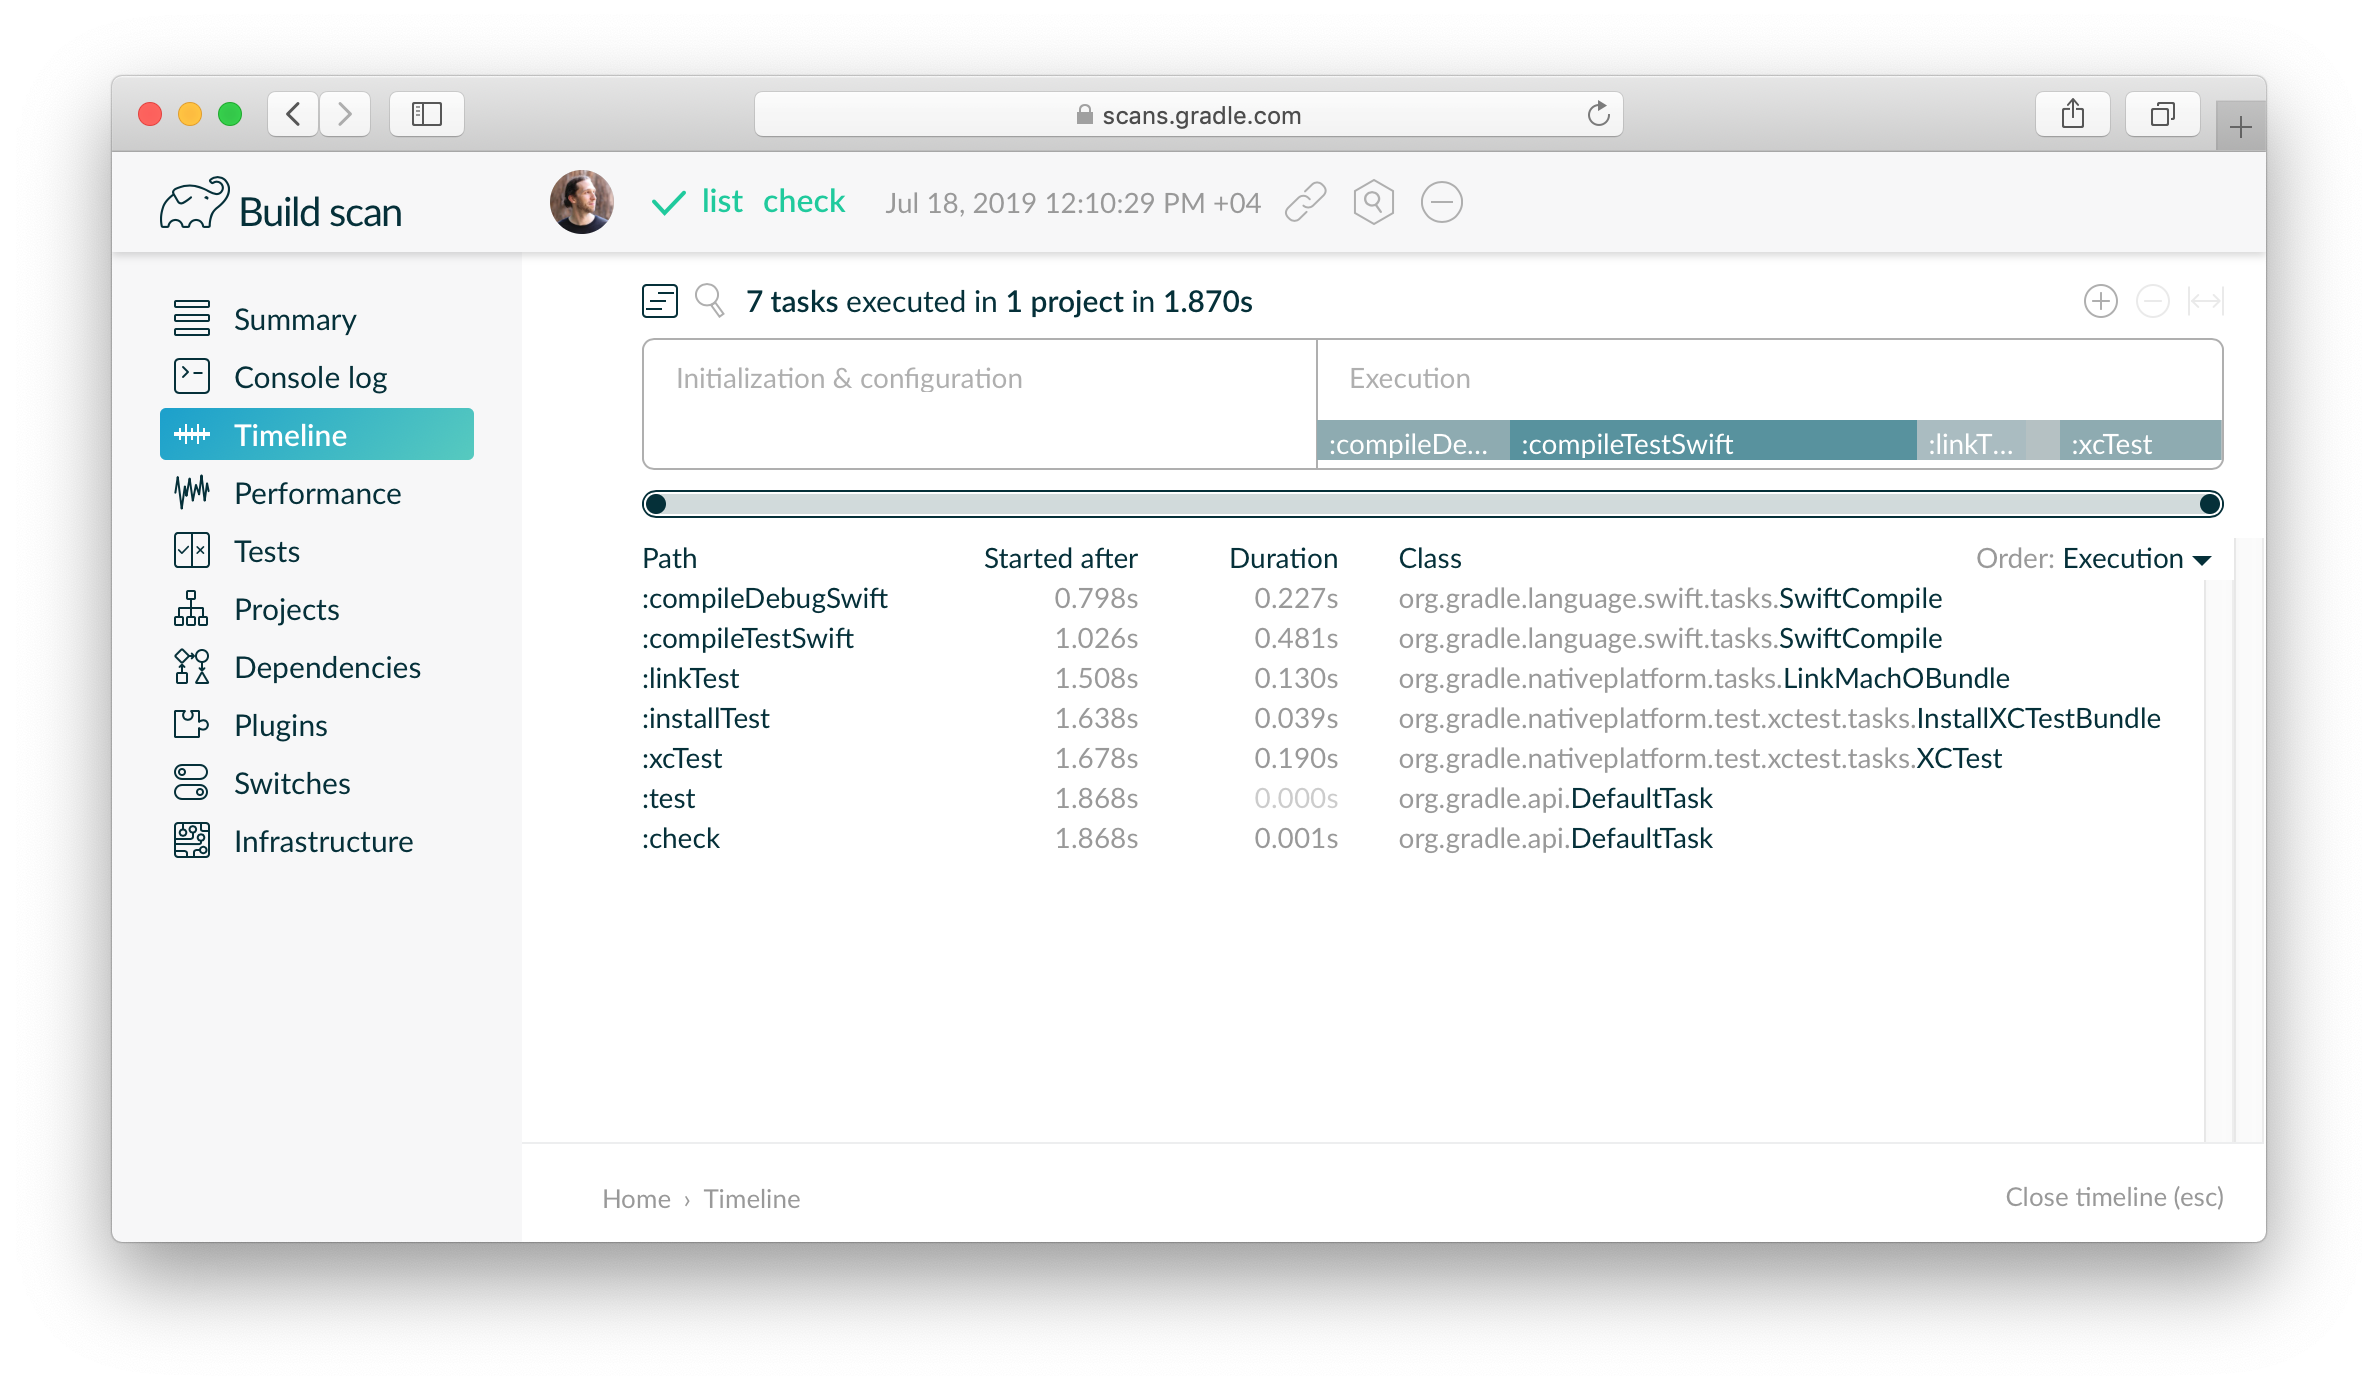
Gradle has a deep understanding of this testing framework.
It can generate JUnit and HTML test results report as well as supports the LinuxMain.swift convention for declaring the XCTest Linux executable entry point.
It also supports basic test filtering.
Build scan support, parallel execution and improved filtering for XCTest will be added later.
Fast builds #
The plugins can produce debug and release builds of the application or library using Gradle’s new variant-aware dependency management, so that debug builds are compiled and linked against debug library binaries, and release builds are compiled and linked against release library binaries. When you build the debug build, which is the default, Gradle builds only the debug builds of the libraries that you need, rather than building everything.
Developer and CI builds are fast.
Swift compilation is a cacheable task, so you can avoid unnecessary and long compilation times when using the build cache.
Gradle Enterprise comes with a build cache backend.
You don’t need to use the --parallel option as Gradle does incremental and parallel compilation and linking by default.
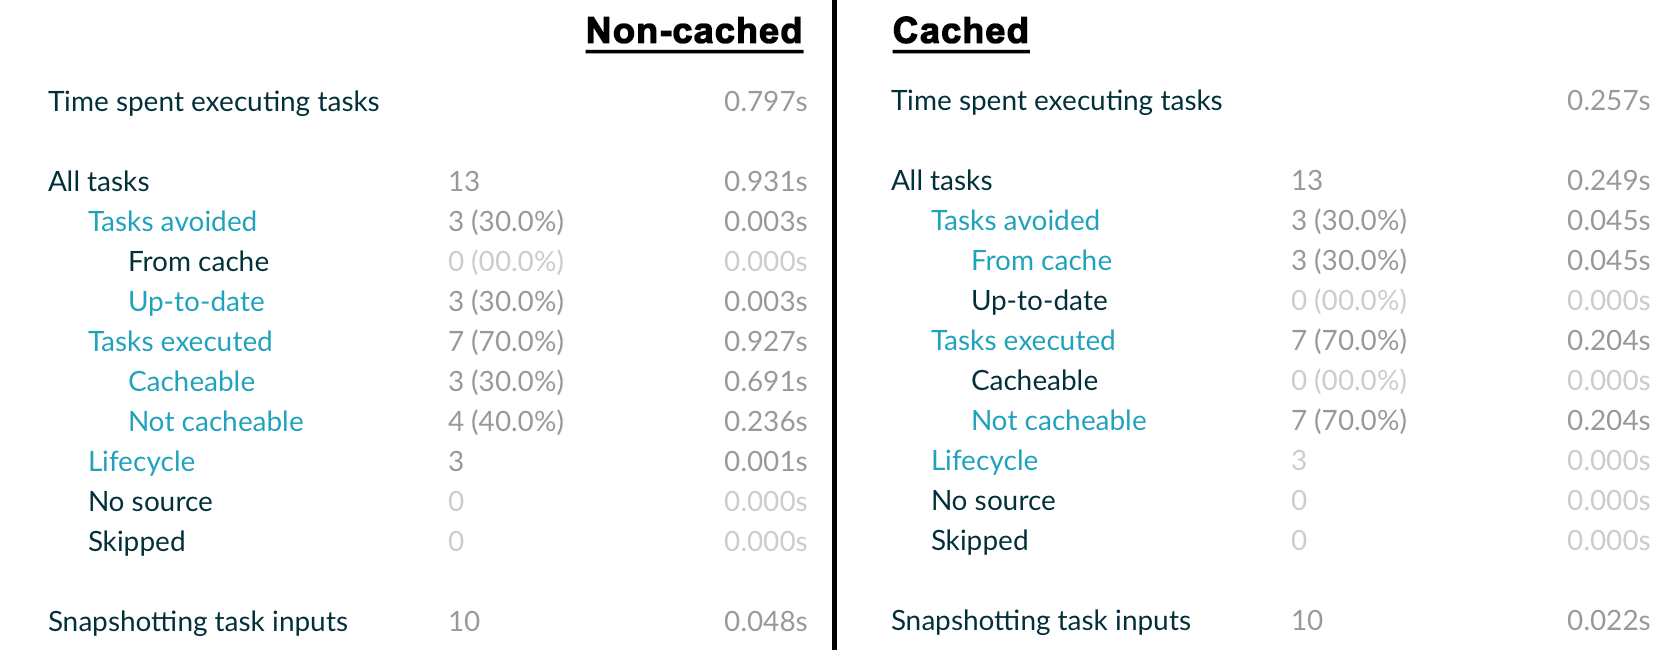
Let’s run some clean builds that use the build cache:

You can see that the second build is faster, as the result is fetched from the build cache rather than recompiled. Build scans for non-cached build and cached build.
Composite builds #
Composite builds also work the same as in Java or C++ projects. This sample using a composite build combines builds so they can be worked on together:
rootProject.name = 'app'

includeBuild 'utilities-library'
includeBuild 'list-library'
Here’s the result in Xcode. The application and the libraries it uses are available to edit, build and test together:

Operating System and Source Compatibility #
Native projects can also configure the operating system (a.k.a target machines) for Swift components.
Each component script block (e.g. application, library, xctest) can configure the targetMachines property.
The configured target machines will participate in the build variant for the machine compatible with the build host.
For example, the following specifies that the application is only buildable on Linux machines.
plugins {
    id "swift-application"
}

application {
    targetMachines = [machines.linux.x86_64]
}
On a Linux machine, a variant of all the tasks will be created.
As shown on the screencast below, the assemble task compiles the debug variant, also known as the development binary.

The other variant release is buildable via the linkReleaseX86-64 tasks.
On other operating systems, Gradle won’t build anything since no target machine is compatible with the build host. It’s worth noting that none of the tasks mentioned previously will be created as the variants aren’t buildable. Instead, invoking the assemble task will simply print an informative message as shown in the screencast below.

Source dependencies #
Support for source dependencies was recently announced in the Introducing source dependencies blog post.
In short, source dependencies allow Gradle to use other projects as dependencies directly from source. It is common practice for Swift developers to build dependencies from source. Gradle takes care of all the wiring required to build sources before building the consumer.
If the source dependency build is a Gradle build, the experience will be similar to a composite included build. On the other hand, if the source dependency is built by another build system, Gradle can inject configuration code to execute the right build commands and map the artifacts into a Gradle build.
Documentation #
If you are familiar with the native samples repository, chances are you are already familiar with the samples demonstrating what can already be achieved with Swift plugins. With Gradle 5.6, we released additional documentation to help new users get on-board with Swift development. We suggest reading the Building Swift Projects and Testing Swift Projects chapters of the user guide to get started.
We have also introduced reference chapters for each Swift plugin. You can also read the Xcode plugin reference chapter to learn how to use the Xcode IDE during your Swift development.
Providing Feedback #
These plugins are a work in progress and have some limitations. For example, model elements such as debuggability don’t allow any configuration yet and you’ll need to resort to using compiler/linker flags.
We’ll continue to improve these plugins, make them stable, and eventually support iOS application.
Please try these plugins out and let us know what you think. The easiest way to get started is to clone the native samples repository and follow the instructions. Our samples use a Gradle nightly build, so you’ll see the latest and greatest developments there.
We’d love to hear what you think works well, what’s confusing, and what is missing that would block you from using Gradle to build Swift software. You can also leave feedback on the Gradle forums or raise issues on the Gradle native GitHub repository.