A Better Way to Use Gradle With Github Actions
Table of Contents
Running Gradle builds on GitHub Actions #
GitHub Actions provides a convenient and powerful CI platform for projects hosted on GitHub. To enhance the experience of building Gradle projects on GitHub Actions, the Gradle team has developed the gradle-build-action. Together with Gradle Build Scans™, the gradle-build-action provides deep integration between Gradle and GitHub Actions, providing easier setup and a better experience when building and testing your Gradle project with GitHub Actions.
The gradle-build-action is the officially supported way to run your Gradle build in GitHub Actions, taking care of preparing and optimizing Gradle for your GitHub Actions workflow. When applied to a workflow, all subsequent Gradle invocations will be optimized, allowing you to simply run ./gradlew build in a regular workflow step.
The primary features provided by the gradle-build-action are:
- Download and install a specified version of Gradle (if required)
- Save and restore the Gradle User Home directory between workflow runs
- Display results and Gradle Build Scans for any Gradle build executed in your workflow
Each of these features is described in more detail below.
Using the Gradle Build Action #
It’s easy to take advantage of the gradle-build-action by adding a setup step to your existing GitHub Actions workflow, similar to the way you would use the actions/setup-java action to configure a JVM for your workflow.

For details on how to use the gradle-build-action in your workflow, check out the Gradle Build Tool documentation or the README.
Features of the Gradle Build Action #
Save and restore the Gradle User Home directory between workflow runs #
The Gradle User Home directory persists a lot of valuable state that speeds up subsequent invocations of Gradle. Downloaded dependencies, compiled build scripts, the local Build Cache and generated API jars are all stored in the Gradle User Home.
Each GitHub Actions Job runs on a fresh build runner, meaning it will start with an empty Gradle User Home directory. Fortunately, GitHub Actions provides a caching mechanism that allows the Gradle User Home state to be saved after running one job, and restored before running another. This can greatly reduce the time spent running your Gradle builds, by removing the need to re-download dependencies, re-generate Gradle API jars, etc.
Getting this caching right is not trivial, however. It’s easy to save too much state (quickly filling the GitHub Actions cache), or underspecify the cache key (leading to important things being omitted).
The gradle-build-action takes care of the details for you, saving and restoring the most important files from Gradle User Home in a Job-specific manner, while extracting common files and saving them separately in order to reduce redundancy in the entries stored. Much of the behaviour is configurable and tweakable. Details of the Save/Restore strategy employed by gradle-build-action (and the related configuration options) will be the topic of a future post.
Display outcome and Gradle Build Scan for every build #
By default, GitHub Actions does not integrate deeply with Gradle in the way some other CI platforms do. It provides no high-level view of build outcomes, or nicely rendered display of tests passed and failed. Instead, you are required to inspect the logs for any failure messages, and test reports need to be saved as build artifacts which can be downloaded to inspect any test failures.
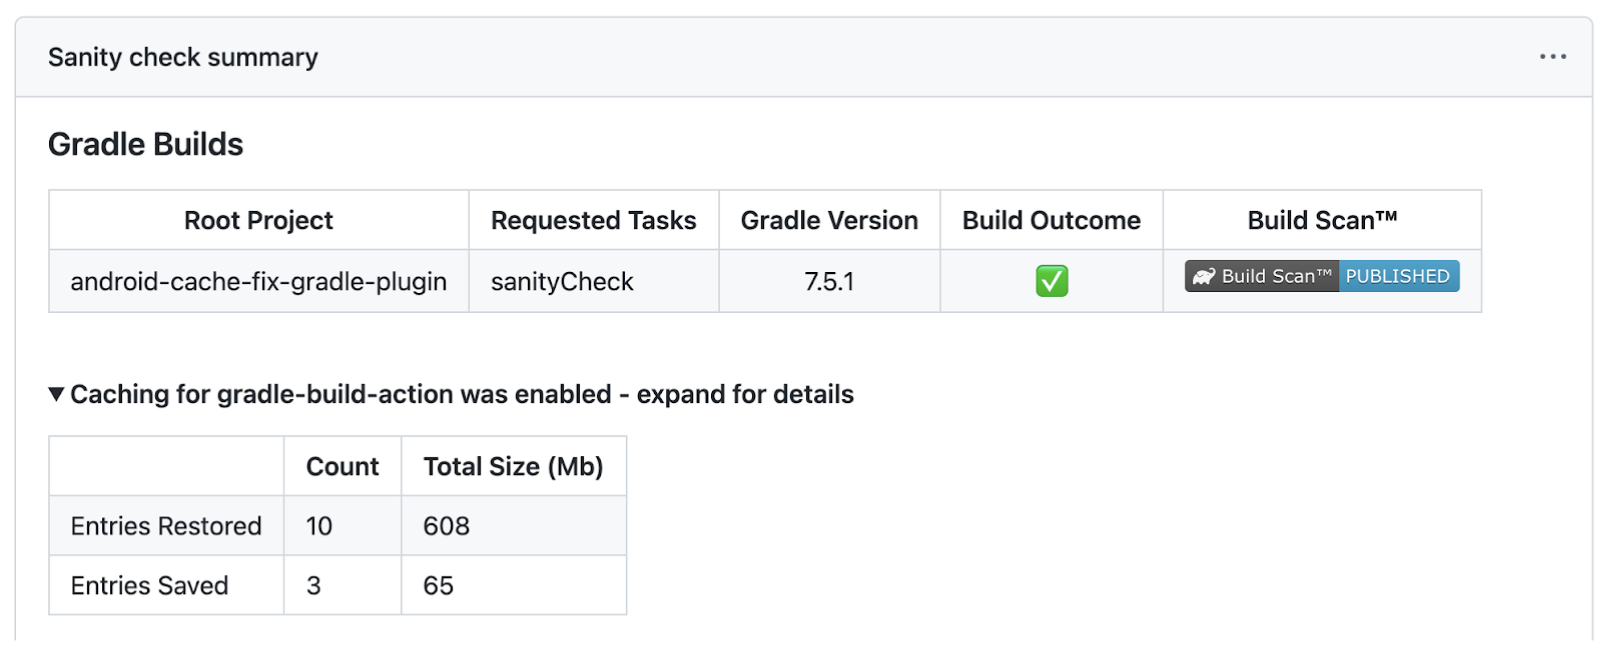
However, by using the gradle-build-action and by configuring each Gradle invocation to publish Build Scans, you can set up your GitHub Actions workflow to provide these usability features you have grown to expect. The gradle-build-action instruments all Gradle build invocations, capturing details such as tasks executed, build outcome and the link to any Build Scan produced. And the linked Gradle Build Scan provides a complete view of a build execution, including all build logs, a complete task timeline, test outputs, dependencies resolved and performance characteristics of your build.

For more details, read about how the Google AndroidX team leverages the gradle-build-action and Gradle Build Scans to help them troubleshoot build and test failures faster in their GitHub Actions CI environment.
Execute your build using a specified Gradle version #
We recommend that most projects use the Gradle Wrapper to run Gradle, and by default the gradle-build-action will not download or install a Gradle Distribution. But there are certain situations where you may want to run your build with a different version of Gradle: e.g. you want to smoke test your build with a Gradle release-candidate, or you want to test your Plugin samples with a matrix of different Gradle versions.
For this purpose, the gradle-build-action is able to download and install any version of Gradle. If a ‘gradle-version’ parameter is supplied to the action, it will download (and cache) the Gradle distribution zip, install it, and add it to the PATH. Alias values like ‘latest’, ‘release-candidate’ and ‘nightly’ are also supported. This installed version will then be used when you run gradle in a subsequent workflow step.
Why use the gradle-build-action? #
If you’re familiar with GitHub Actions, you may be wondering why you’d want to use the gradle-build-action instead of simply configuring actions/cache or actions/setup-java to save and restore Gradle dependencies between workflow runs.
We believe the gradle-build-action offers substantial benefits: please check out this section of the action README. If you still have questions, feel free to ask at https://github.com/gradle/gradle-build-action/issues.
A better experience with Gradle and GitHub Actions #
The gradle-build-action provides a simple and effective way to run Gradle builds on GitHub Actions, maximizing the use of the GitHub Actions cache and presenting important information about each Gradle execution. When combined with free Gradle Build Scans (or self-hosted Gradle Enterprise Build Scans), running Gradle builds on GitHub Actions is better than ever.